Pop-up forms are easy-to-maintain and highly impactful ways to communicate important messages, announcements, and promotions that will convert website visitors into highly qualified SMS and email subscribers.
Use the drag-and-drop Form Builder to customize and manage your signup forms flexibly. Customize branding, manage form fields, and even edit your welcome text message triggered by form submissions. With a pop-up form, leverage your website's traffic to turn casual site visitors into purchasers.
In this article, we’ll learn about:
- Creating a website pop-up
- Customizing the form’s setup and fields
- Setting the pop-up behavior and triggers
- Styling your pop-up
- Create a follow-up welcome SMS message
Create a Pop-Up Form
To create a new pop-up,
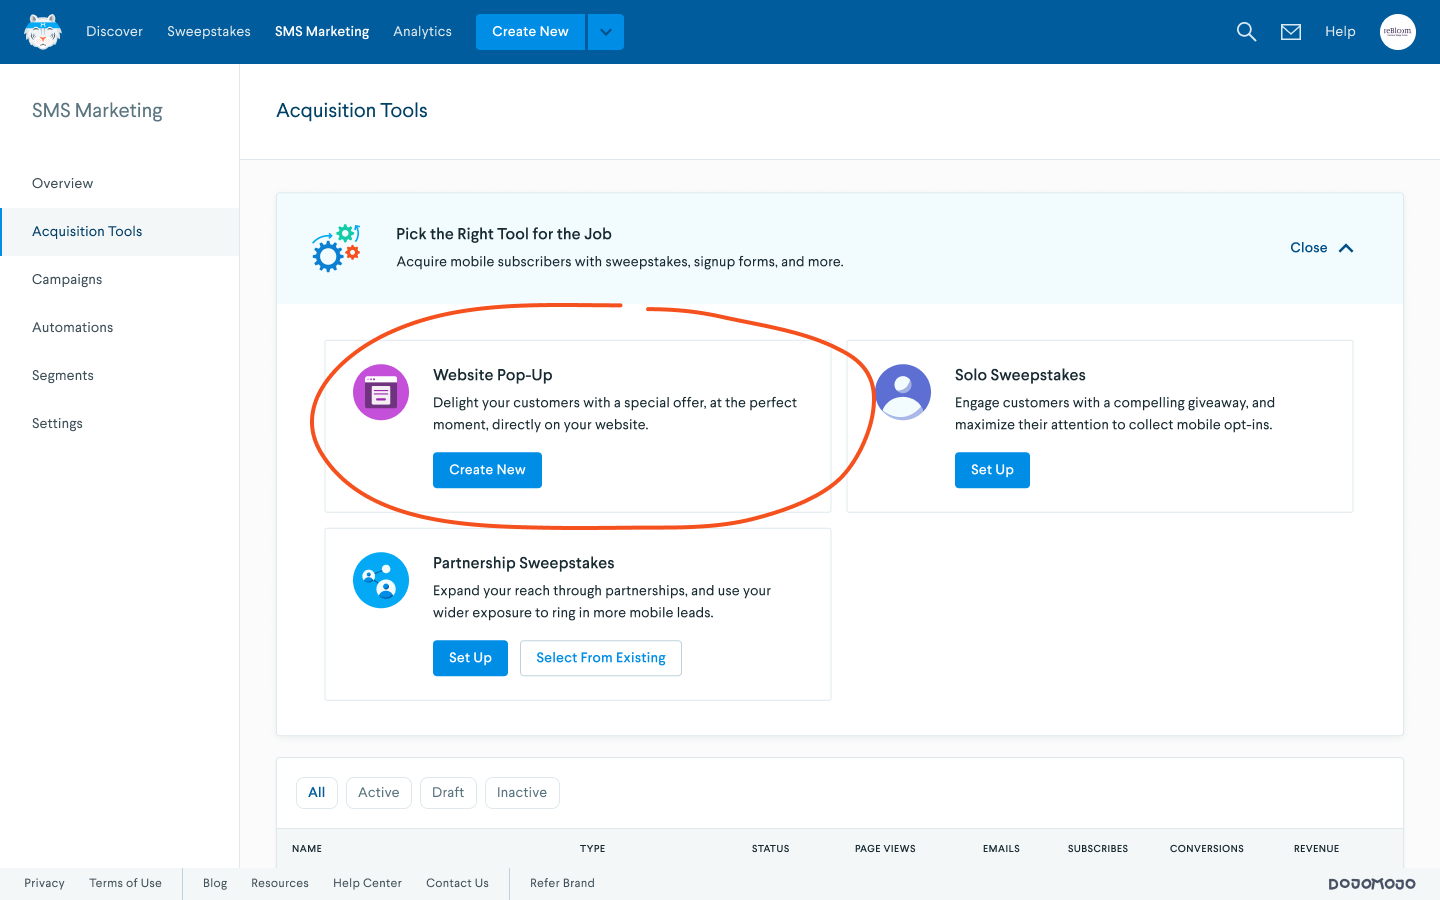
- Head to Acquisition Tools in the SMS Marketing suite.
- Choose Website Pop-Up and select Create New.

- Give your pop-up form a name. This name will not be visible to your website visitors–use the pencil icon
 to edit the form name.

Add and Edit Form Fields
In the Form’s Setup panel and Fields tab, you’ll see the mobile field and email address field added to your form by default.
NOTE: We'll automatically add SMS consent language to the form when the mobile phone field is added.
To add more fields to your pop-up:
- Select Add Field at the bottom of the Fields tab to search for existing standard fields or create a new custom field.
- Once a field has been selected, it will appear under the Field options. Drag and drop fields into one of the form’s pages in the section above. The form preview will update on the right.
In the left panel, you can edit the field’s options, including:
- Field name: the name of the field that will appear only internally and in your SMS audience reports. Note that field names are hidden for standard fields.
- Display name: the placeholder text that appears on the live form. The text will display as the sample text in the input box for the field.
- Make this field required: when the checkbox is selected, the field will be required for submission.
(Optional) Value: When an ESP is connected to the Form Builder, you can send data between your pop-up submissions and your email marketing provider. Enter the ESP’s field key or merge tag to map the (pop-up) field to an ESP field.
Form Settings: Behaviors and Triggers
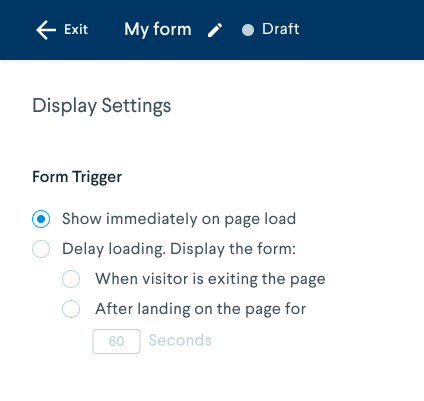
As with all marketing, the timing of your pop-up ad can significantly impact the likelihood of a visitor’s willingness to complete your form.
To customize how your pop-up will be triggered on your website:
- In the Setup panel, find the Behavior tab, and Edit your Display Settings
- Choose from one of the trigger options.

Form Design: Styling Pop-Ups
The Form builder comes with the ability to style and brand and customize the design of your pop-up form. This is done through the builder’s Design panel. A preview of the pop-up will update in the right panel as you edit the form’s lead image, text styles, and theme.
In the left Content tab, you can customize:
- Hero image(s): Add a hero or lead image for the pop-up
- Titles and subtitles: Hide or display titles and subtitles in the form
On the right panel, click the title, subtitle, and CTA buttons to edit each element's text and text styles, including fonts, text colors, and text decorations.
You can change the styling options for your pop-up under the Theme tab. This section manages the form’s layout, color settings, logo display, and button stylings across the whole form. Continue to customize each section until the form is designed exactly how you want it to appear to your website visitors.
Craft an SMS Welcome Series
In the Message panel, create and manage the automated text message that a visitor will receive after submitting the form.
NOTE: It is required to create a welcome text for all form submissions. Pop-ups cannot be published or displayed without a welcome SMS message.
In the Message panel, head to the SMS Marketing Welcome message tab and select Create Drip to open the message editor.
Craft the text message(s) that you want to send to new subscribers who submit your form. Send a warm welcome and keep it concise. For example, if you included a special offer, discount, or promotion in your pop-up form, remember to include a coupon code or instructions on how to redeem your promotion in the text message.
Sync the Form with an Email Welcome Drip (Optional)
With a validated ESP integration, you can send the email contacts collected from your pop-up form to a specific audience in your ESP so you can manage and reach new email contacts straight from your email marketing platform.
Publish and Install the Form
In the top right, click Save & Publish to take your form live and make it available to install on your website. Follow our guide for instructions on how to install and embed the pop-up form on your website.